

Sealing hardwood floors might sound like a chore, but it’s one of those things that pays off big time. Especially if you live in San Jose, where the weather can get a bit unpredictable, properly sealing your floors means they’ll last longer and look better. This guide breaks down everything you need to know—from prepping your floors to picking the right sealant and even keeping them looking fresh for years to come.
Key Takeaways
- Sealing hardwood floors protects against moisture, dirt, and wear, making them last longer.
- Prepping your floors, like sanding and cleaning, is a must before applying any sealant.
- Choosing between water-based and oil-based sealants depends on your needs and preferences.
- Applying multiple coats of sealant can provide extra durability, especially for high-traffic areas.
- Regular maintenance, like cleaning and resealing, extends the life of your sealed floors.
Understanding the Importance of Sealing Hardwood Floors
Benefits of Sealing Hardwood Floors
Sealing your hardwood floors is more than just a cosmetic upgrade. It’s a protective shield, keeping your floors safe from moisture, dirt, and daily wear and tear. Here’s what a good sealant can do:
- Prevents stains: A sealed floor is less likely to absorb spills, making cleanup easier.
- Minimizes scratches: Especially in high-traffic areas, a protective layer reduces visible damage.
- Extends lifespan: Proper sealing ensures your floors remain beautiful and durable for years.
Without sealing, even minor accidents like a spilled drink or a dragged chair can leave permanent marks. Call us today to protect your floors and keep them looking new!
Common Risks of Unsealed Floors
Leaving your hardwood floors unsealed can lead to costly problems over time. Some risks include:
- Water damage: Unsealed wood absorbs moisture, which can lead to warping or swelling.
- Stains and discoloration: Spills can seep into the wood, leaving unsightly marks.
- Splintering and cracking: Without a protective layer, wood is more prone to physical damage.
Sealing isn’t just about looks—it’s about protecting your investment.
Why San Jose Homes Need Proper Sealing
San Jose’s climate, with its mix of dry summers and occasional wet winters, can be tough on hardwood. Humidity changes can cause wood to expand and contract, leading to cracks or gaps. A reliable sealant acts as a barrier, helping your floors withstand these environmental shifts.
Protecting your hardwood floors in San Jose isn’t optional—it’s a smart way to preserve your home’s value and keep your floors looking great year-round.
Properly sealing hardwood floors might feel like a chore, but the results are worth it. A little care now ensures years of beauty and durability.
Preparing Your Hardwood Floors for Sealing
Clearing the Room and Removing Obstacles
Before you even think about sealing, you’ve got to make sure the space is ready. Start by clearing out all the furniture, rugs, and anything else sitting on the floor. Trust me, you don’t want to trip over a coffee table while you’re working. Also, check for any nails, staples, or debris that might damage your tools or mess up the floor. A clutter-free space is key to getting this job done right.
Sanding for a Smooth Surface
Sanding is where the magic happens. Use sandpaper or a sanding machine to smooth out the floor. Start with coarse-grit sandpaper to strip away any old finish, then gradually switch to finer grits to get a silky finish. Always sand in the direction of the wood grain—going against it can leave scratches that are a pain to fix later. And don’t rush this step; a smooth surface makes all the difference when you apply the sealant.
Cleaning to Eliminate Dust and Debris
After sanding, your floor will be covered in dust. Use a vacuum to suck up the bulk of it, then follow up with a tack cloth or a slightly damp mop to grab the finer particles. Dust-free floors ensure the sealant sticks properly and doesn’t trap any debris. Just make sure the floor is completely dry before moving on to sealing.
Choosing the Right Sealant for Your Hardwood Floors
Water-Based vs. Oil-Based Sealants
When it comes to sealants, you’ve got two main types: water-based and oil-based. Water-based sealants are loved for their quick drying time and low odor. Plus, they won’t yellow over time, so your floors keep their natural look. On the flip side, oil-based sealants are known for their durability and that rich, glossy finish. However, they take longer to dry and can have a stronger smell. If you’re looking for a more eco-friendly option with fewer chemical emissions, water-based might be your go-to.
| Feature | Water-Based | Oil-Based |
| Drying Time | Faster | Slower |
| Odor | Mild | Strong |
| Finish | Clear, Natural | Rich, Glossy |
| Environmental Impact | Lower VOCs | Higher VOCs |
Factors to Consider When Selecting a Sealant
Picking the right sealant isn’t just about preference—it’s about your lifestyle and needs. Here are a few things to keep in mind:
- Foot Traffic: High-traffic areas like hallways or living rooms might need the toughness of oil-based sealants.
- Aesthetic Goals: Want to keep the wood’s natural color? Water-based is your friend. Prefer a deeper, amber tone? Go for oil-based.
- Maintenance: If you don’t mind reapplying every few years, hardwax oil is easy to repair. For a long-lasting finish, stick with polyurethane options.
- Environment: For homes in San Jose, where eco-conscious choices are common, low-VOC water-based sealants or hardwax oils are great picks.
Eco-Friendly Options for San Jose Homes
Living in San Jose, sustainability might be on your mind. Luckily, there are sealants that align with greener living. Water-based polyurethanes are a solid choice, as they emit fewer VOCs and dry quickly. Another option is hardwax oil. It’s a natural product that enhances the wood’s texture while keeping things environmentally friendly. Just remember, these options might need a bit more upkeep compared to traditional oil-based sealants.
Choosing the right sealant isn’t just about durability—it’s about finding a balance between protection, appearance, and how much maintenance you’re willing to put in.
Step-by-Step Guide to Properly Seal Hardwood Floors
Applying the First Coat of Sealant
Start by ensuring your floors are completely clean and dust-free. Use a paintbrush or roller to apply a thin, even layer of sealant, working in small sections for better control. Always follow the wood grain to maintain the natural appearance and avoid streaks. For water-based sealants, you’ll appreciate the quicker drying time, while oil-based options might give a richer finish.
Drying and Curing Times
Patience is key here. Let the first coat dry as per the manufacturer’s instructions. Typically, water-based sealants dry in a few hours, while oil-based ones might need a full day. Avoid walking on the floor during this period to prevent smudges or damage to the sealant.
Adding Additional Coats for Extra Protection
For areas with heavy foot traffic or homes with pets, adding a second or even third coat is a smart move. Allow each layer to dry completely before applying the next. This extra effort will give your floors a longer-lasting shield against wear and tear.
For sealing hardwood floors, choosing the right products and techniques is essential to ensure long-lasting protection.
Maintaining Sealed Hardwood Floors for Longevity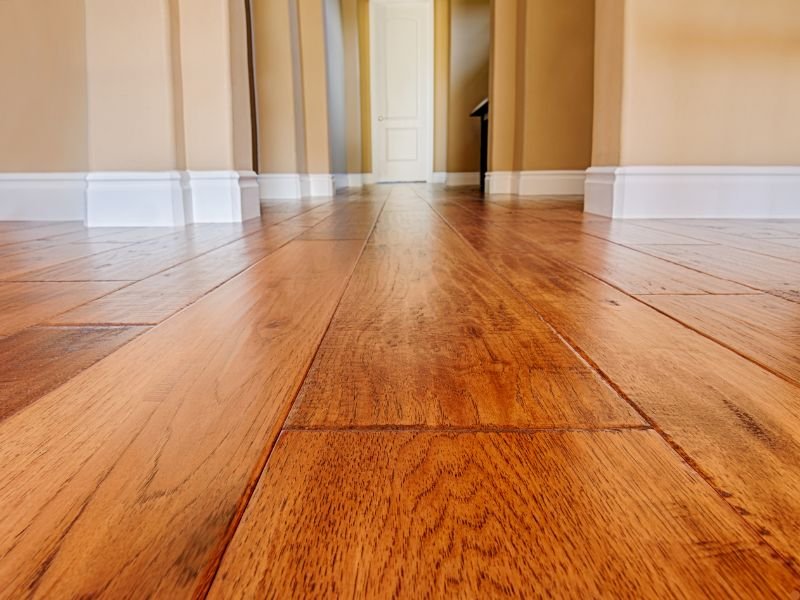
Daily Cleaning Tips to Avoid Scratches
Keeping your sealed hardwood floors clean is the first step to ensuring they stay scratch-free. Regular sweeping or vacuuming is a must to remove dirt and grit that can act like sandpaper on your floors. Use a soft-bristle broom or a vacuum designed for hardwood to avoid damage. For extra protection, place mats at entrances to trap debris before it gets inside. Avoid harsh chemicals or abrasive cleaners—they can strip away the sealant and dull the finish.
Protecting Floors from Furniture and Spills
Furniture and spills are two of the biggest threats to sealed hardwood floors. Add felt pads to the bottom of furniture legs to prevent scratches when moving items around. For high-traffic areas, consider rugs to act as a buffer. Spills should be wiped up immediately to prevent moisture from seeping into the wood. Remember, even though the sealant provides a barrier, prolonged exposure to liquids can still cause damage.
When to Reseal for Optimal Protection
Sealed floors don’t last forever. Over time, the protective layer wears down, especially in areas with heavy foot traffic. A good rule of thumb is to reseal your floors every 3-5 years, but keep an eye out for signs like dullness or uneven texture. If you’re unsure, perform a simple water test: sprinkle a few drops of water on the floor. If the water beads up, the sealant is still effective. If it soaks in, it’s time to reseal.
Professional Services for Hardwood Floor Sealing in San Jose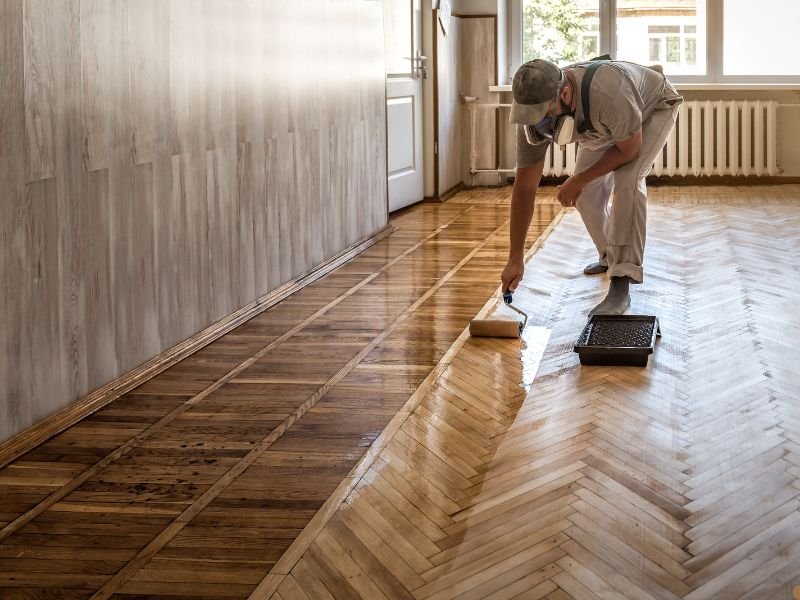
Benefits of Hiring Experts
When it comes to hardwood floor sealing, professional expertise makes all the difference. Experts have the right tools, techniques, and materials to ensure a flawless finish. Hiring professionals also saves you time and effort, especially if you lack experience with sealing floors. Additionally, they can identify potential issues, like uneven surfaces or moisture problems, before they become major headaches. This proactive approach ensures your floors not only look great but last longer. Call us today to schedule your hardwood floor sealing and enjoy a professional, long-lasting finish!
What to Expect During a Professional Sealing
When you hire a professional service, here’s what typically happens:
- Initial Assessment: The team examines your floors to determine their condition and identify any prep work needed.
- Preparation: This includes sanding, cleaning, and ensuring the floor is ready for sealant application.
- Sealant Application: Professionals apply the sealant evenly, often using multiple coats for added durability.
- Drying and Curing: They allow the sealant to dry properly between coats and ensure the final layer cures fully.
- Final Inspection: Once the process is complete, they’ll inspect the work to ensure everything looks perfect.
Finding Trusted Providers in San Jose
San Jose has no shortage of options for hardwood floor sealing, but choosing the right provider is key. Look for companies with positive reviews, transparent pricing, and a proven track record. For example, Clark’s Hardwood Floors specializes in professional hardwood services, including sealing, staining, and refinishing. Their expertise ensures your floors get the care they deserve. Always ask for a detailed quote and timeline before committing to a provider.
Ready to restore your hardwood floors? Contact us today for a detailed quote and expert sealing services
Wrapping It Up
Sealing your hardwood floors is one of those tasks that might seem like a hassle, but it’s totally worth it in the long run. Not only does it keep your floors looking great, but it also protects them from all the wear and tear life throws at them—especially if you’ve got kids, pets, or a busy household. Whether you’re tackling it yourself or hiring a pro, taking the time to seal your floors properly can save you a lot of headaches down the road. So, grab your tools, follow the steps, and enjoy the peace of mind that comes with knowing your floors are ready to stand the test of time. And hey, if you’re in San Jose and need a hand, there are plenty of experts around who can help you out.
Frequently Asked Questions
How often should hardwood floors be sealed?
Hardwood floors typically need sealing every 3 to 5 years, depending on how much wear and tear they experience.
Can I seal my hardwood floors on my own?
Yes, sealing hardwood floors can be a DIY project if you follow the right steps and take proper precautions.
What type of sealant is best for hardwood floors?
The best sealant depends on your needs. Water-based sealants dry faster and have less odor, while oil-based sealants offer a richer finish and more durability.
How long does it take to seal hardwood floors?
The process, including preparation, application, and drying, can take a couple of days to complete.
Are there eco-friendly options for sealing hardwood floors?
Yes, there are eco-friendly sealants like water-based finishes or soy-based products that are safe for the environment and your home.
When should I reseal my hardwood floors?
You should reseal your floors when you notice the finish wearing off, scratches becoming more visible, or water soaking into the wood.
